 F-111 aircraft as it takes off from RAAF Base Darwin. Photograph is part of the Public Domain.")
The subject
The General Dynamics F-111C is a variant of the F-111 aircraft series. It was based on the A-version but featured the strengthened undercarriage of the FB-111A and the longer wings of the F-111B. The only operator of the aircraft was the Australian Air Force, which received the first of 24 ordered aircraft in 1968. Once it fully entered into service it proved to be highly successful despite it never saw any combat. This because there wasn’t any other aircraft in South-East Asia area that had a higher combat range or would be able to keep up with the supersonic bomber. For over two decades, there wasn’t even an aircraft in their own arsenal that would be able to keep up with the “Aardvark”. During the seventies, the RAAF decided to reinstate the aircraft with photographic reconnaissance capacities, while retaining it ground strike capability. This variant became known as the RF-111C. Australia also used several F-111G’s for conversion training purposes. In total the RAAF used 28 F-111C’s and 15 F-111G’s.
The last RAAF F-111’s were retired in 2010. In the final months of 2011, the aircraft became rather infamous in aviation circles, as 23 airframes were buried in a landfill instead of being preserved or scrapped.
This article is partially based on information found at wikipedia, 30th may 2015.


The kit
- Subject: F-111C Royal Australian Air Force
- Manufacturer: Academy
- Scale: 1/48
- Parts count: 287 parts (70 not used)
- Serial: 12220
- Price: 40/60 EUR – 50/70 USD
- Personal rating: ✭✭✭✭✭ ✭✭✭✭✭


The contents
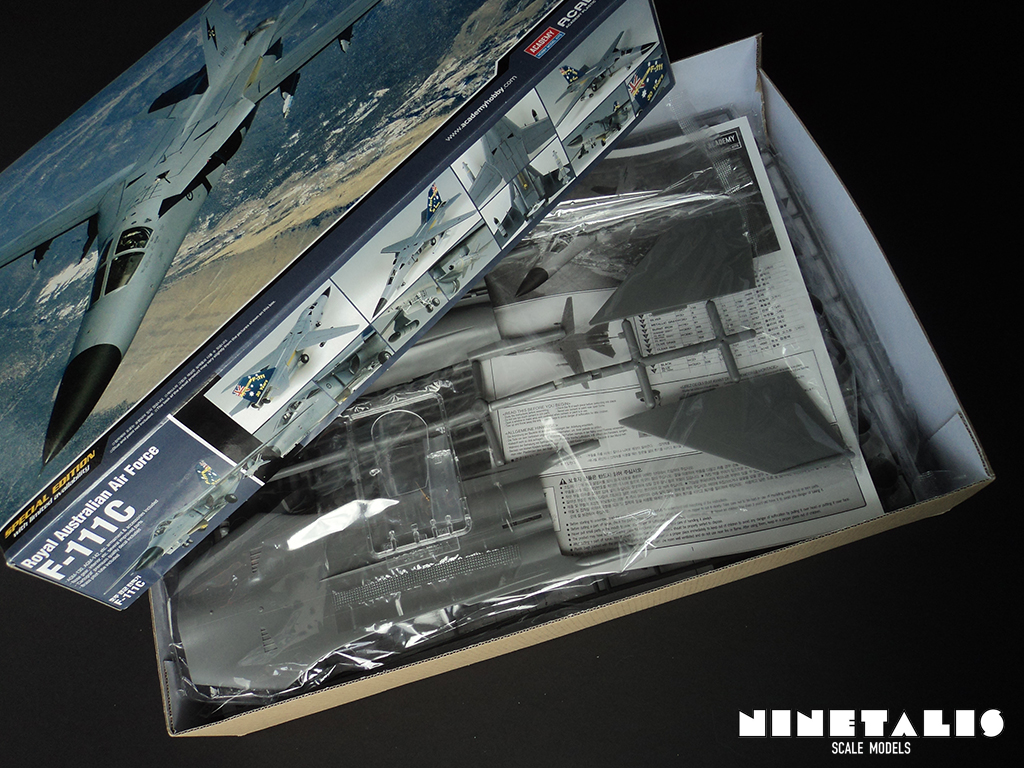
When opening this kit, you are greeted by a box that is filled to the brim with large frames featuring many, many parts. In total, we have ten frames that feature a total of 287 parts. The thing that makes this kit so special compared to Academy’s previous F-111 kits, is that there are a three new frames added, as well as a a small turned brass pitot tube. The other side of this story is that, because of this, a rather large amount of parts are not usable for this kit. 70 to be exact.
But not only the parts are present in large numbers, The decal sheet is also rather large, with options for six different markings! (which is something we’re more used from companies like Eduard). It should not be surprising that these are all markings for Royal Australian Air Force Aardvarks, since this kit is supposed to build up a F-111C.


Sprue 1
The first sprue (if you can call it that) feature just four parts, which are the upper and lower fuselage and both halves of the tail section. The parts feature recessed panel lines and the lower fuselage is outfitted with a detailed landing gear bay. Inside the landing bay we can find much details like cables, generators and much more.


Sprue 2
The second sprue holds parts like the forward fuselage area, the wheels, forward landing gear bay, the hard points, horizontal stabilisers and exhausts. We can find both raised and recessed panel lines. With the exhausts it becomes clear that there is no internal engine included with the kit. This is definitely something (and probably the only thing) that a serious builder will have to address if he or she is planning to build a top notch model.
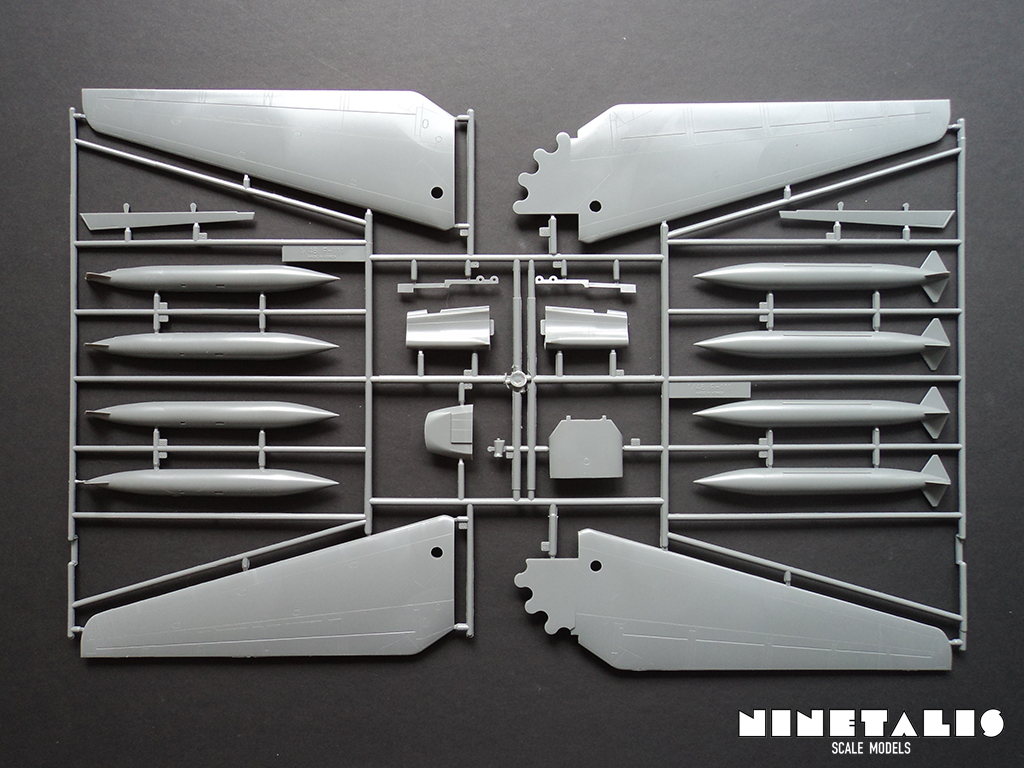
Sprue 3
With the third sprue we get the drop tanks, airbrake and the lengthened wings which are typical for the C-variant of our Australian F-111 aircraft. The wings feature a special system to replicate its swing wing capabilities after the construction of the model. The drop tanks which can be found here have the capacity to hold 600 US gallons (2,300 L).

Sprue 4
The fourth sprue is made up from two sprues. The first sprue features the inner and outer parts of the air intakes. The second sprue can be disregarded with this, as it only features parts that are not usable with this kit. I suppose these are parts for a other variant of the F-111 aircraft series.


Sprue 5
The last of the unnamed sprues holds various parts, like the cockpit, half of the tires and some of the parts that are needed to recreate the F-111’s swing wing capabilities. The instrument panel is depicted by using raised panel lines. Now, some of you might already think that this needs to be replaced, do not worry. This is where the updated parts come in, which you will be able to see on the S sprue.
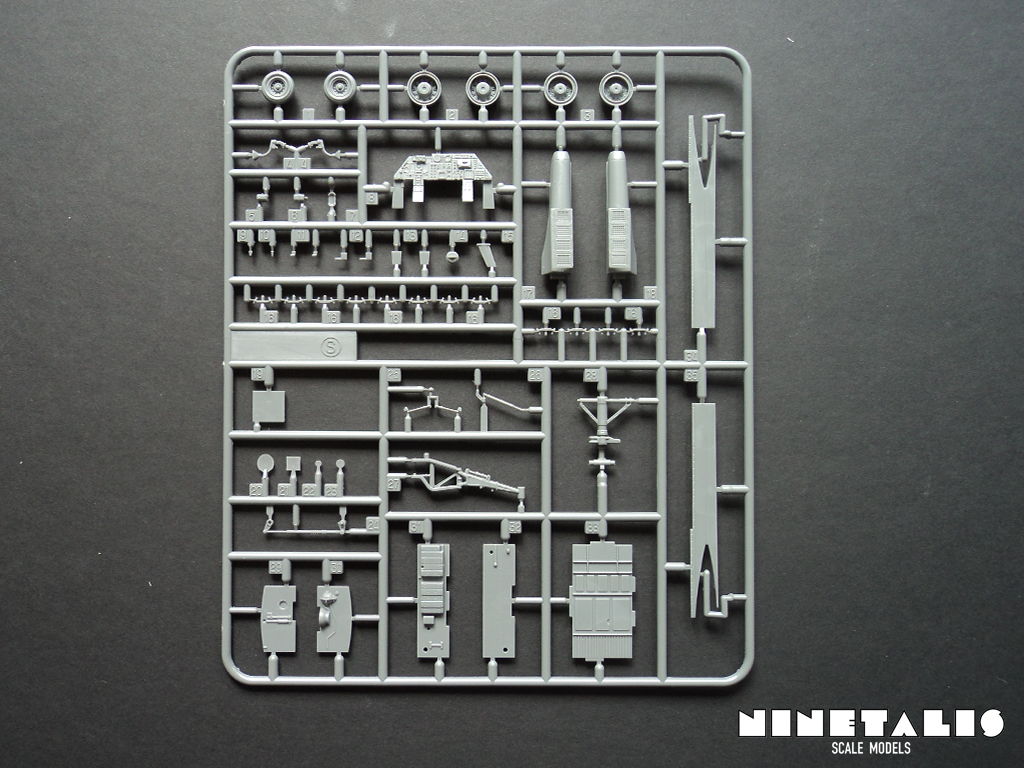
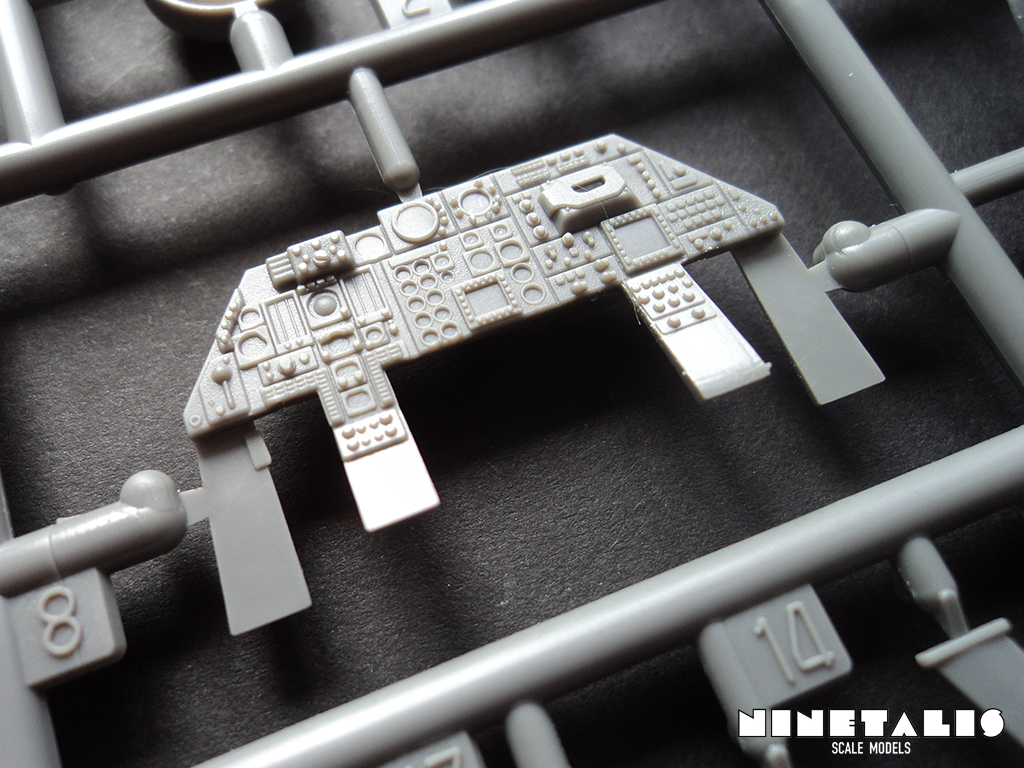
Sprue S
This frame is probably what this kit is mostly about. It mainly holds updated cockpit parts and are accompanied with parts for the landing gear, the &wheels and their rims. They are an real improvement compared to the parts they are meant to replace, like the instrument panel, which just featured some raised lines as can be seen in the previous pictures.
It would be truly awesome to see manufacturers update their kits more often. I’d love it if Academy would upgrade some of cockpits on their WWII aircraft kits, but let’s talk about that some other time.
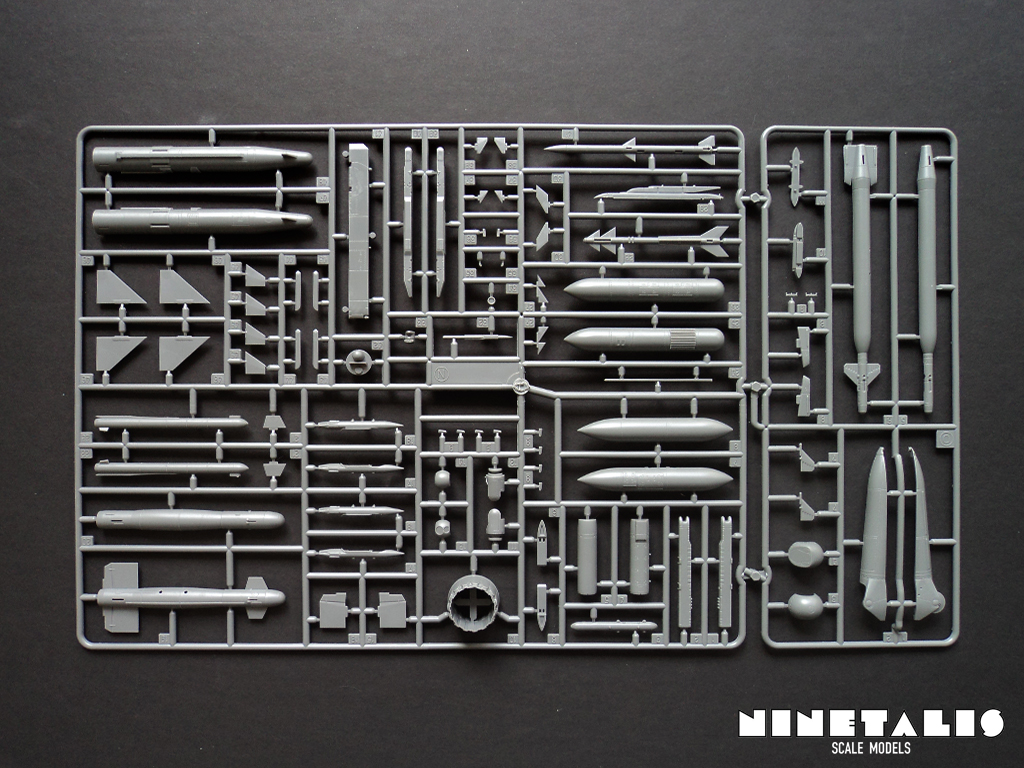


Sprue N & O
The N and O sprue are the frames that feature the armament that you will be able to place beneath the aircraft. The roots of these two sprues can be found with the recent F-15 kit, which was only released a few years before this one. The parts are highly detailed, as can be seen by the close up shots. The armament that can be found are the AGM-142, the AN/ASW-55 and AN/AXQ-14 datalink pods and the AGM-130 air-to-surfice missile, as well as some other armament that can be used with later projects.
There’s plenty of choice for additional armament, although I’m sure not everything on this sprue is also used on RAAF F-111’s or even F-111’s in general, but what you can and can’t use exactly is something I will leave to the more knowledgable people among us. The cool thing about this is that you’ll certainly can’t sling all of this beneath the F-111 and you’ll have lot’s of material to put into your spares box.
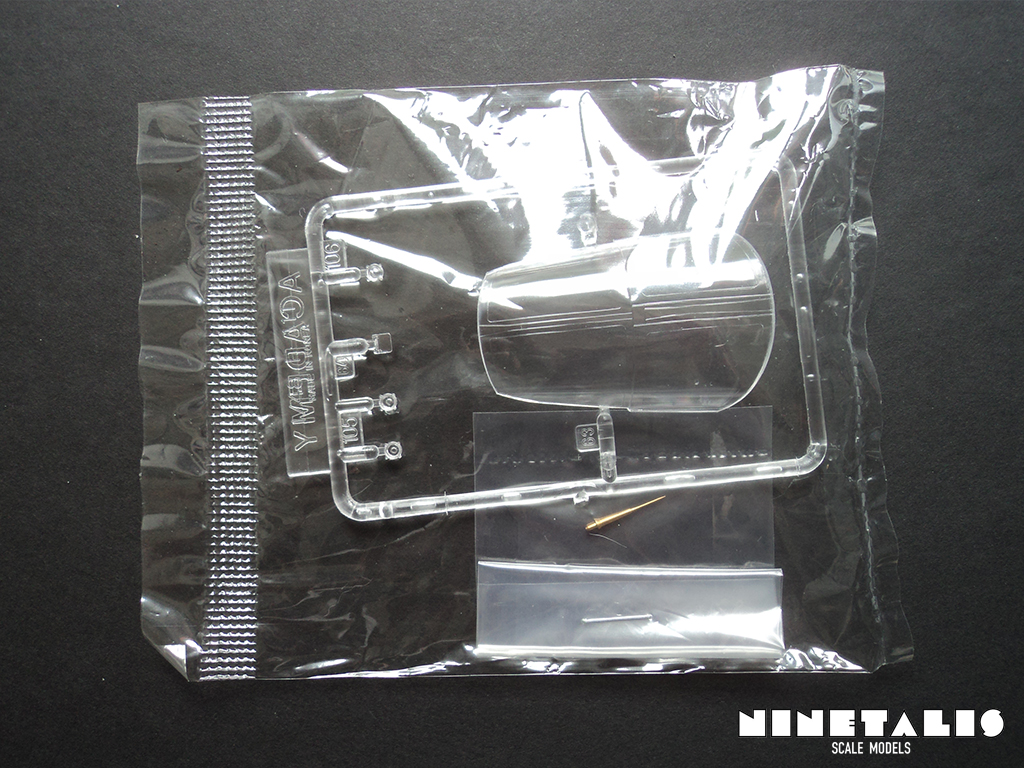


The clear sprue & pitot
In contrast to the rest of the kit, the clear parts of the kit are not an updated version. Don’t worry though, as the parts are good enough for the model itself. In total, there are five clear parts and on the biggest piece, which is the canopy, we can find recessed lines to depict the borders for each of the hatches to enter and exit the aircraft, and small lines to depict edges of the windows.
Now, the clear parts might not be updated, but we do get a small turned brass pitot part. This is one of the first time I see a turned brass part inside an aircraft kit and it would be nice if this would happen more often, as pitot tubes and antennas tend to break quite easily.


The printed material
Just like the large amount of frames, their is also a rather large presence of printed materials. Aside from an instruction sheet, we get an A3 sized ‘poster’ showing off the six paint schemes on one side and the stencil placements on the other. As I’ve just mentioned stencils, it’s not surprising that we get a quite large decal sheet that is about the size of an A4 sheet of paper. Last is the usual Academy warning sheet and a small leaflet which explains how to use decals and place them onto your model.


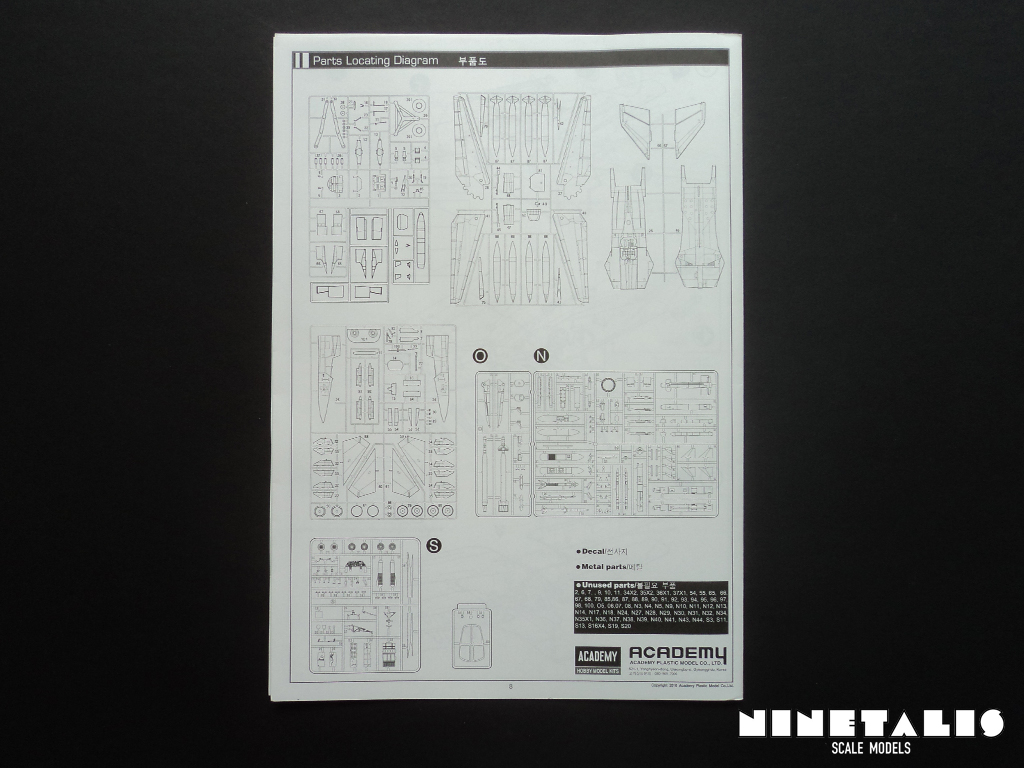
The instruction sheet
Academy’s instruction sheet with this F-111 is extensive and shows all the necessary steps to complete the F-111, including the ones for the armament that comes with it. These are obviously updated since the last release of their F-111C because duh, new parts, but also because I’ve seen the previous instruction sheet myself, which sports completely different illustrations consisting of thicker, cruder lines.
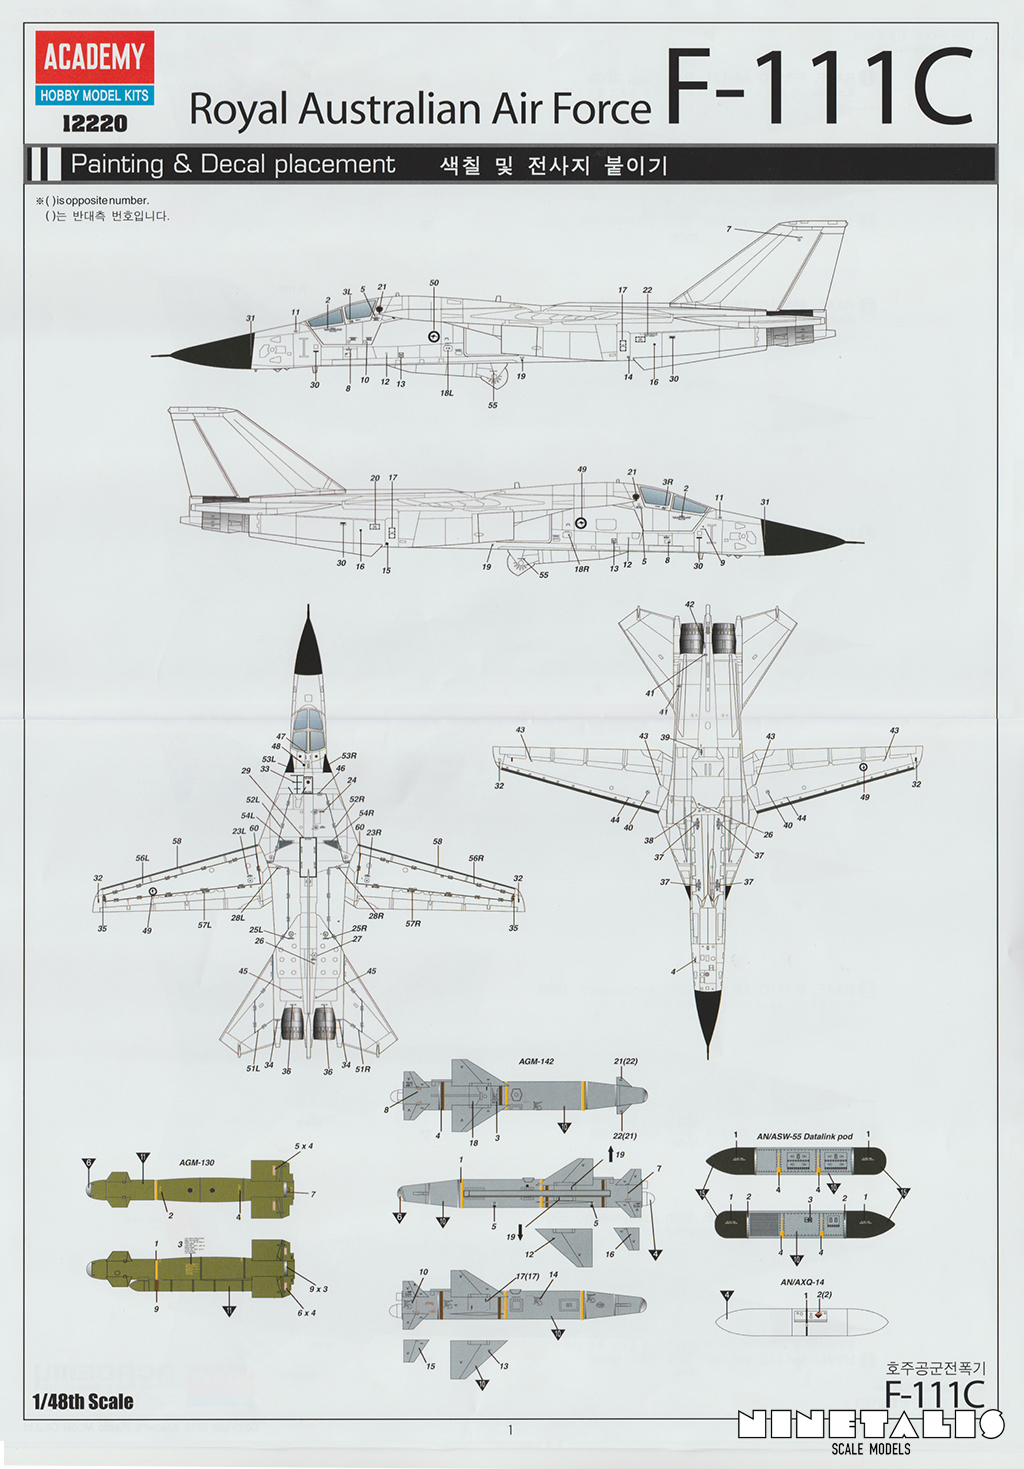
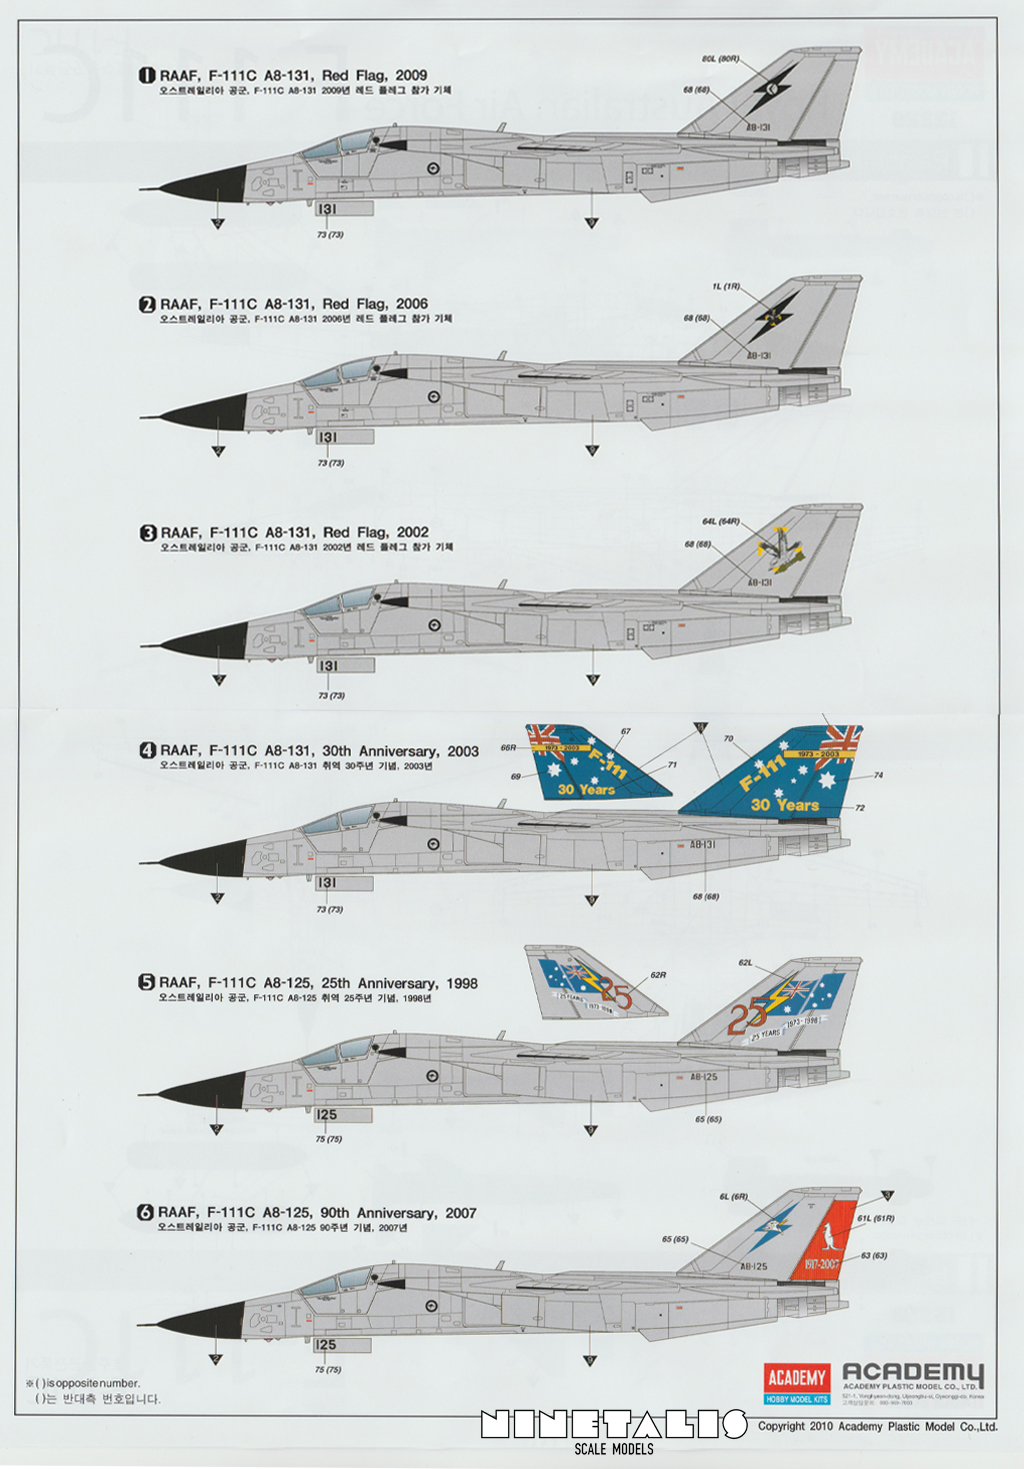
The markings
In total there are six different paint schemes to choose from! This is not something we’re used from Academy, but would love to see this more often! The six paint schemes only depict two aircraft, but at different time periods. We have four from AB-131 and two from AB-125. Three of these are from Red Flag excersises, while the other three are ‘Anniversary’ markings. Schemes included are the following:
- RAAF, F-111C A8-131, Red Flag, 2009
- RAAF, F-111C A8-131, Red Flag, 2006
- RAAF, F-111C A8-131, Red Flag, 2002
- RAAF, F-111C A8-131, 30th Anniversary, 2003
- RAAF, F-111C A8-125, 25th Anniversary, 1998
- RAAF, F-111C A8-125, 90th Anniversary, 2007
Whatever you like to build, I’m pretty sure that most of us will be temped to use at least one of these paint schemes to build, unless you really want to do a USAF aircraft of course, but honestly, then you’d also be better off with buying another kit.

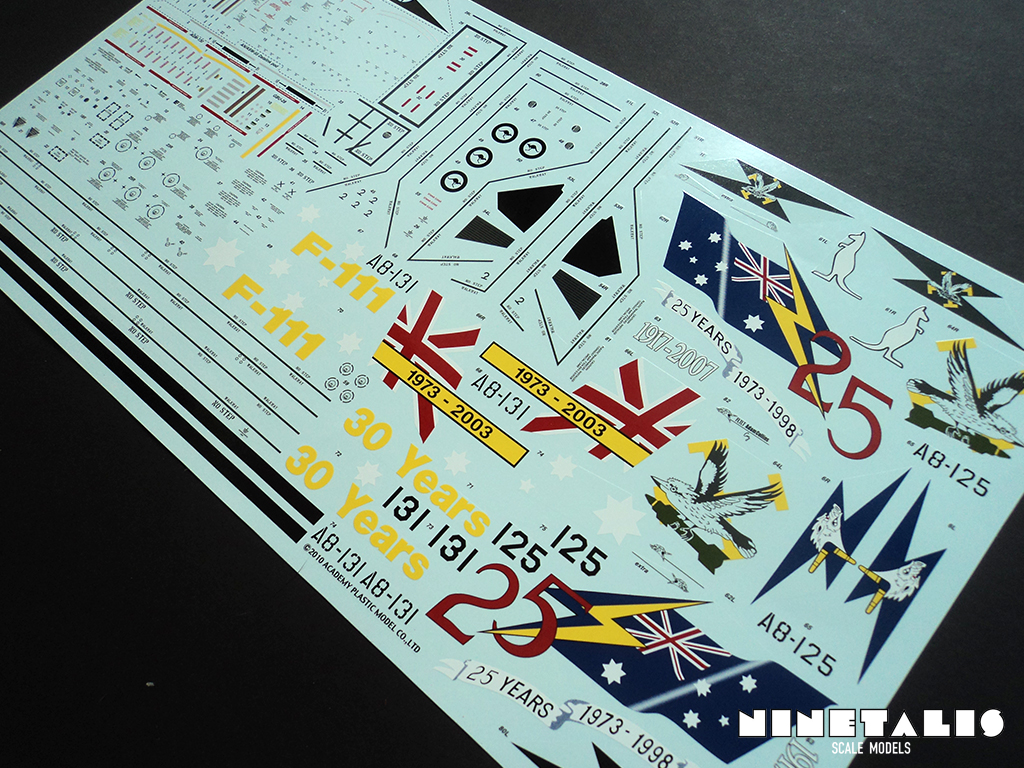
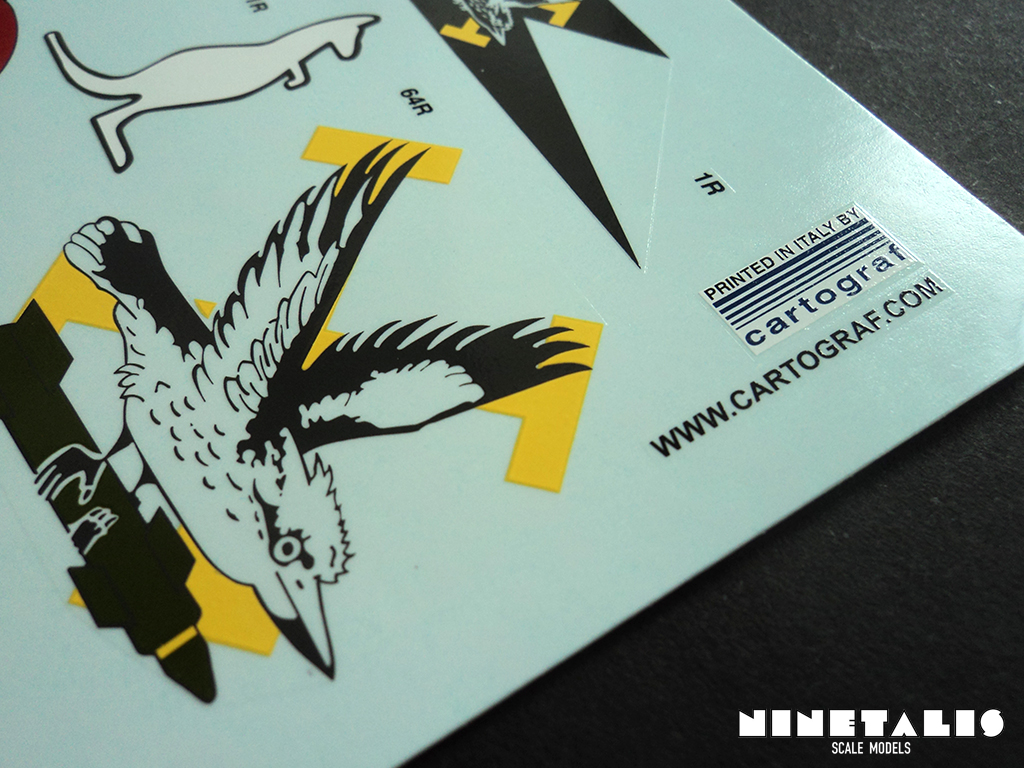
The decals
The decal sheet is very impressive. Not only are the decals very detailed, but the stencils are also present on the sheet in large numbers. Last but not least, the decals are also printed by Cartograf, so the quality should not be put into question.
Conclusion
The F-111 is a massive aircraft and this kit truly embodies that. With a total of 287 parts, this has to be one of the largest kits in my stash. The kit hits big on each area, parts count, decals, markings and even additional armament. This has to be seen relatively of course, because 70 of the included parts are not to be used. This does mean a lot of leftover parts for our spare boxes, even including some external armament that can be used on other aircraft. The only thing that might need an update here are the exhaust nozzles.
I just wish it would happen a bit more often that a kit is re-released with such a big number of new and updated parts. Especially the line of WW2 fighters by Academy could use some updates inside their cockpits. Either way, this kit is really neat and definitely worth its money, and I’d buy another one right away if I was a bit more interested in the aircraft itself. Personally, if Academy does a EF-111 with updated parts as well I’d run off to the store to get one of that as well!
