
As this is the first in the series, I’ll be taking something rather easy, using basic and simple materials which you can easily find in the smaller art shops, and create a wooden container holding some coal.
You can easily fill these containers with whatever you feel like, or just make a closed wooden crate which where used until the introduction of intermodal containers during throughout the 1950’s.
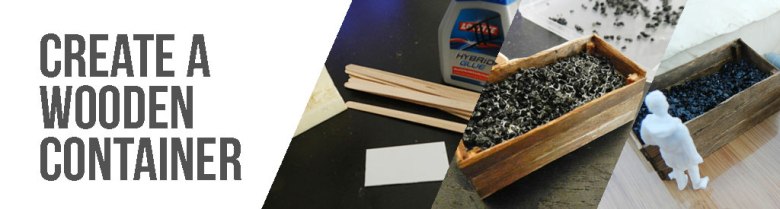
These are some of the materials we will use.
- A small sheet of styrene, 1mm in thickness. You could also use a wooden plate.
- Loctite Hybrid glue(you can also simply wood glue which dries slower). Don’t use super-glue or Zap a Gap for this one, it will eat away most of the forms.
- Some polystyrene, but you can also use some other type of foam which you can easily cut but has some strength to it.
- A few wooden stirrers, which you can buy in packs at certain (art) shops or pick up from a nearby coffee place.

Cut the styrene plate into the size you want it to have. When you have done this, cut the foam at the same size as your plate. Make sure you cut in the height you want it to have before glueing it on. Don’t forget your material (the coal) will also come on top of it.

Glue the foam on top of your plate with the Hybrid or wood glue. You don’t need to do this if you want to make a somewhat empty case.
Meanwhile, While this is drying, cut the amount of pillars you want the container to be build around. Make sure you don’t make them to heigh, best thing you can do is use a figurine in the scale you want to use this, to make sure it doesn’t look unrealistically big.
When the glue has dried a bit, cut the foam away where you want the pillars to go and glue them in place, preferably with a glue that dries quite fast and will be strong enough to hold it in place.

Because I’m making a coal container, I’m going to paint the foam black, so when some parts of the foam are not well covered by the coal or glue it won’t attract to much attention. Make sure you don’t paint your pillars.
I used some fingerprint acrylic paint because I didn’t have any regular in my house right now, but regular acrylic paint will be better because it dries faster and better.

Here you can see the paint drying and what you want to try to achieve. It doesn’t need to be perfect on the sides, but make sure you somewhat cover it in case two stirrers don’t line up well.

Measure and cut the stirrers in the length and width of your design. It doesn’t matter that they aren’t perfect when you want to make some sort of container that would have been constructed in the field, as they would have used whatever wood they had lying around.

After you have completed glueing all the wooden elements in place, give it a wash with whatever product you like to use, if you use to much, you can gently scrape some of it off with your scalpel/X-acto knife to create highlights.
You don’t have to wash it, since we are using wood it eyes already quite realistic. But, depending what kind of diorama you are building, you should do it to create a bit more depth and detail in your work.

Now that our container is ready, we can fill it up with coal (or whatever material you feel like filling it up with). The material I used is Berka’s ‘imitation coal’, a material often used by train modellers.

Next thing I did was diluted some wood glue with some water, ratio would have been something as a 4 glue/1 water, but you can do it to whatever ratio you like. You want it to be just enough diluted so the glue becomes fluid enough to pour it into the box,
but here a warning, the box is probably not watertight, so a fraction of the diluted glue will probably come pouring out the sides and bottom, make sure you wipe it of, because if it dries, it might cause unnecessary frustrations.

Pour the Imitation coal on top it, and gently pour the excess back into something to collect the coal that didn’t get to attach itself onto the glue. Repeat this process until you have the amount of coal you want represented in your container.
I kept on pouring in until I had enough, this is how it should look with the glue, don’t worry to much about the white parts, it will become transparent after a while.

And this is what it should look like when the glue is all dry. If there are still some white spots between the pieces of coal because of the glue, you can remove it with some thinned black paint, or use some ‘Tamiya panel line accent color (black)’ as I did.

As a final small detail, you can replicate traces of the allegedly used nails with a rivet stomper if you have one. You don’t have to do it, but it will make it all the more convincing and realistic.

And this is what it could look like on the side of your diorama. I’ve added a figurine in scale so you can compare.

And one from the entire base, one more detail for a diorama in progress.
I hope you enjoyed this and if you liked it! Be sure to let me know what you think of it, hints or proposals, or things you would like to see in the future! If you try this yourself, leave a picture for me and others to enjoy as well!

Hi great rreading your blog